Thursday, 27 October 2016

Tee Pee card


Loved doing this in class today.  This tee pee style is a Claire Rowlands way of making it....it couldn't be more simpler :)

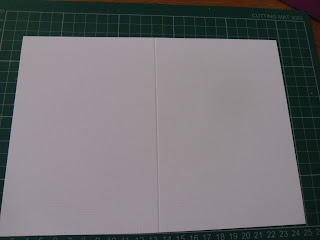
I began with a piece of card 9" x 6 1/2"
I then scored it at 4 1/2" along the 9" side, to fold in half.


 With the fold at the bottom, and the open ends at the top, measure 4 1/2" along the top, and put a pencil mark on the open edges.  Repeat this along the bottom, folded edge.
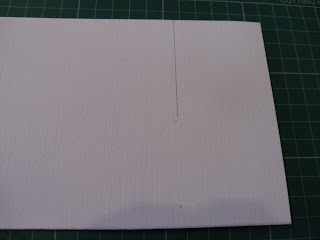


 Use a ruler to line up between these two marks ......


.....and draw a line 2 1/2" down from the top.
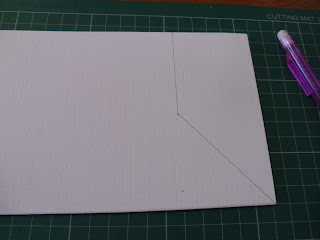


 From where this line ends, join up to the bottom corner.


Remove this section.


 Open out.


Score from the centre fold line at the top, down to the outer left point.  Repeat to the right side.
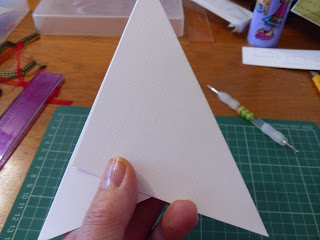


You will now be able to fold it into the tee pee shape.


Next cut the decoration papers.  You will need :
2 of 4 1/4" squares
1 or two (if you want different papers) of a 5 cms square....this will allow you to trim a slither off if necessary.
Cut them in half diagonally.


Arrange the pieces how you would like them (any wording or directional patterns will need to be considered for when the tee pee is closed up.  Trim any slithers off as necessary.  Glue in place.


In it's folded position, you can overlap in either direction, punch a hole where you want your ribbon to come out....outer layer only.  Then with a pencil, draw through the hole to mark the layer underneath.


This next hole needs to go through the next two layers...which hopefully the folded position is obvious from the photo on the left.  If you can't punch through both layers at the same time, punch the first hole and draw through as you did in the previous step.

 
Fold up.


Thread ribbon through, and if you wish any embellishments e.g. bells, charms etc., and a greeting.  Alternatively the greeting could be added to another face of the teepee.


I stamped a picture I wanted to put on it.  As there were parts I didn't wish to cut off, I firstly marked in pencil where my die was going to cut, marking both the outer and the inner circles.  I cut around the overhang (stocking and candy cane) to just past the inner marked circle.  This allowed me to lift the overhang, over the top of the die so it wouldn't cut through these parts.  This is how it looks after cutting, with the die still in position.

 
I also cut a slightly larger, decorative mat to frame the picture....

 ....coloured it in....


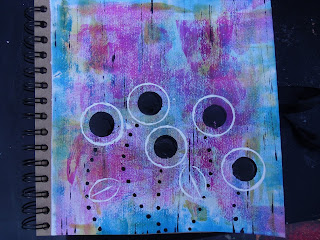
....and fastened it to the front of my card.  Et voila :)  See the photo at the top

Christine

Sunday, 16 October 2016

Snowflake Resist


I know I promised I would leave Christmas cards alone for a while, but the Thursday craft group wanted to revisit the resist technique, and this was as simple as it gets.

I began by stamping a variety of snowflakes in a rough 'band' across the upper part of my card, using a versamark ink pad, and heat embossing in a clear embossing powder (white powder is also ok to use) .


 I then added low tack tape to mask off the area I didn't want to ink....creating that 'band' of colour.


I used three different Distress inks randomly swirled across the embossed snowflakes (which are providing a resist to these inks).


Remove the tape.

Now to remove the resist.  You will need a hot, dry iron and a clean sheet of copier paper, which will soak up the melted embossing powder.  Put the clean copier paper over the stamped images, and press the hot iron over the top. 

When you lift your iron off, you will see the copier paper has soaked up the melted images.  Look at your card, and make sure that all the embossing powder has been removed, leaving the base white card where the snowflakes were stamped.  If you need to repeat the iron process, make sure you use clean paper otherwise what you have already melted could transfer to another part of your card, or the iron sole plate.


I then over stamped and embossed a larger snowflake in a silvery white powder (bottom left), and added a greeting.  I haven't yet trimmed, matted and mounted onto a base card, but you get the idea :)

Christine 

Saturday, 8 October 2016

A Better Person


I fancied a therapeutic play so decided to do some journalling.  I love Kate Crane's work, and this is similar to her style.


I randomly added colour, to what was a slightly textured heavy weight Kraft paper, but use whatever you like.  I used a brayer to spread and blend the acrylic paints *** keep cleaning your brayer in between with wet wipes **  I dragged a few vertical lines in black using an old credit style card.  A couple of different sized bottle tops to start the flowers and leaves, and the end of a paint brush to make dots for the stems.


Black and white pens were used to add finer detail - loops, crosses, leaf veins, dots etc.


If ever you are stuck on what to journal, or don't know where to begin, quotes always come in handy.  Use a typewriter style font, and when you have printed them out, draw a rough (uneven) line around the words - or in this case as it was a long quote, I grouped several words together.  Cut out, again not being too wworried if they are perfectly straight.

Cut out and add to your page.....Et Voila !!

Christine


Monday, 26 September 2016

Embossing Paste

This week I thought I would make some Christmas cards using  Dreamweaver products, namely the embossing paste and their metal stencils.  The metal ones are slightly deeper than the thin plastic type stencils, so give more dimension when the paste has dried.


I chose a silver embossing paste, and a dark coloured card as a contrast.


I attached the stencil using low tack stencil tape (this doesn't tear your card when removed), and made sure that it was firmly attached to my work mat.  I applied a layer of paste, making sure I had covered all the area and not missed any fine corners or edges.


I then used the scraper to remove the excess paste and give a flat, even surface.
I immediately put the residue paste back into the pot, wiped and cleaned the rim before closing, otherwise it will dry up and be wasted.  I also dropped the tools I had been using, into a bowl of warm soapy water to soak.  


I checked that the image had worked, by removing all but the top piece of tape, and using it as a hinge, I carefully lifted from the open edge to check the image was a good one.  If it hadn't have been, it is at this point that you can re tape and go over what you have done - providing you have used this 'hinge' method, to ensure the stencil goes back down in exactly the same place.  Remove stencil and immerse in warm soapy water until you are ready to clean the tools used.


It then needs to be left to dry fully, preferably overnight.  When dry, you will have a lovely raised surface design....one of those you cannot help but stroke :)

It's then just a case of mounting, whatever way pleases you.


Christine.

Monday, 19 September 2016

Reflective Reindeer


I love this technique, but it does take a little practice.


As we use a brayer to produce a mirror image (reflection) you will need to choose a suitable stamp that will fit around the brayer, without overlapping, otherwise it will not work.  Because we will be producing this reflection first, I like to position my stamp 'upside down' so that I can clearly see that I am doing it correctly.  Ink the stamp up really well - I used black Archival ink - then with a light pressure, roll the brayer over the top of the stamp, picking up the inked image as you do.  You will then need to transfer this image to the lower part of your card, remember 'upside down'.  *** Make sure you roll the brayer to the start point before you touch down onto the card to transfer this image, so that you start rolling from the edge of the design, in this example, the first reindeer, finishing with the sleigh.
It is also worth mentioning, that it is normal for this mirror image to be paler, a reflection in water or snow would not be as crisp.  CLEAN THE BRAYER WITH A WET WIPE.  Ink up the stamp again, and match up the design.


I then used a fine black pen to draw in the line between land and water, trimmed the excess card ......


 .....mounted onto some black card, and added some Glamour Dust for snow.  I love sparkle :)

As you can see from the finished card, I matted a few more bits, just to make it more interesting.  

I had wanted to use the same tree stamp as last week to show you this technique, but unfortunately it was just a little too long for the brayer. 
Christine

Monday, 12 September 2016

Christmas Forest

A very simple but striking card this week...just what you want when you have quite a few to make.  If you haven't got a stamp that has a collection of trees, perhaps you have some individual ones which you can use to make a scene, and perhaps a fine black pen to add some contour lines to the landscape...a few mounds, hills etc.

I simply stamped this in a black ink, along with a simple greeting.  Monochrome always creates something stunning.  I then used a fine nozzle PVA glue, as this is thick enough to hold it's shape and give some dimension, and sprinkled on some Crystal Glamour Dust (ultra fine glue).  I used the nozzle to trace under the contour lines, and randomly scribbled onto each of the trees.

When it had dried, I mounted the image onto some black card, tied some fine ribbon and bow around the corner that had surplus white card showing, fastening the ribbon behind the black mat, then mounted onto a card.  .

Christine

Monday, 5 September 2016

Christmas Poinsettia


This week I decided to use up some waste...we all have some, you know, those strips of paper that you've saved 'just in case'.  I have used a stamp from a Magenta set, which I felt leant itself to decoupaging.  


I stamped and heat embossed in a variety of colours - gold, silver, black, white, crystal sparkle....and I used all the waste strips.


I cut out one as a whole square, then for each, either one flower, or two if you want more dimension.


I slightly shaped the petals by rolling each petal over some scissor blades ***DO BE CAREFUL** 

As you can see, I simply matted the square onto a complimentary piece of card (the two shown are on a gold and a silver mat), and onto an A5 card.  I layered the cut out poinsettia flowers using silicone gel, the first I matched up to the base square, the second I rotated slightly.  I added a few glue dots to the centre and some tiny little bead/balls (which I always thought were called ballentine....but apparently not).  A few peel off words (that's two weeks running I have used peel offs to accent.....I must need a lie down),  and some more Christmas cards finished.
Christine