Here is a simple card I made and thought I would share with you. We don't always have to produce elaborate creations, sometimes the simplest can be just as effective.
I began by making a card to approximately 6" square (this is just slightly under if you are using an A4 sheet of card as I had done). I then cut diagonally on the front face, from the top left (spine) down to the bottom right. I didn't waste this piece, as you can see in the photo below, I reduced the size and used it to make a mat on which to stamp my verse.
I cut paper mats for my front diagonal panel and the inside of the the back face. I inked all my edges with a brown ink.
The image of the boy was stamped onto a piece of white card, and cut to a shape using a die. The signpost was stamped and cut out. Whilst you may not have the signpost stamp, most crafters will have something, even if it is just a flower than can be cut out to add dimension and interest to the front face of the card. The 'Gone Fishing' sign was mounted in a book plate die shape, but this also could simply be double matted to stand proud.
I tied a length of twine around the back face before I added my verse mat, and tied a fish charm to it. Just adding something to dangle adds interest.....oooh, now that sounds like I might be saying something rude !!!!
On that note...I will be back next week :)
Christine
Words, and quotes, can be a wonderful inspiration. There must be a quote or some words of wisdom for every eventuality or situation, be it good or bad, happy or sad. I frequently use quotes in my card making, art journalling and scrapbooking. They can sum up what I want to say far more eloquently than I can, or even be a source - a starting point from which my art emerges.

 I created this book of words using two beer mats for the covers (new...and not pilfered !!) . I cut the pages to the same size and rounded all the corners to match. This is a great way of using up all those oddments of paper that would otherwise go ragged and become unusable. Perhaps even include some of your favourite paper so you can keep some of it....if you are anything like me that has a paper fetish, I find it extremely difficult parting with favourites. I generally have to have two lots, one to use and one to 'stroke' and cherish :)
 I found an abundance of quotes on line and copied and pasted them into a Word document, that I had set up in columns, but a table would also work, just remember to remove the grid lines before printing. This was to ensure that the quotes would fit onto my beer mat sized pages. I played about changing fonts then printed them off. Remember to credit the author of the quote, if there is one.
I then cut them out, some with fancy scissors and border punches, others just straight and some with decorative or rounded corners. I inked some, and others not. On some I collaged punched elements, others added peel offs, others I used border punches. Some of the papers were busy enough and I decided to do very little with them. You can play and embellish to your hearts content. There are no restrictions, it is purely personal choice.
I found an abundance of quotes on line and copied and pasted them into a Word document, that I had set up in columns, but a table would also work, just remember to remove the grid lines before printing. This was to ensure that the quotes would fit onto my beer mat sized pages. I played about changing fonts then printed them off. Remember to credit the author of the quote, if there is one.
I then cut them out, some with fancy scissors and border punches, others just straight and some with decorative or rounded corners. I inked some, and others not. On some I collaged punched elements, others added peel offs, others I used border punches. Some of the papers were busy enough and I decided to do very little with them. You can play and embellish to your hearts content. There are no restrictions, it is purely personal choice.
 I then punched a hole in one cover, and used this to mark the position of the hole in the other cover, and then the pages. I chose to do it this way and fasten together with a book ring so that I could add more pages should I wish. Alternatively you might chose to Zutter bind it. Whatever you decide, enjoy making it and using it for inspiration.
Christine
This card is made using the length of an A4 sheet of card, cut to 5" wide. From the bottom of the card, and moving upwards, score at : 2 3/4"; 3"; 6"; 9"; 9 1/2".
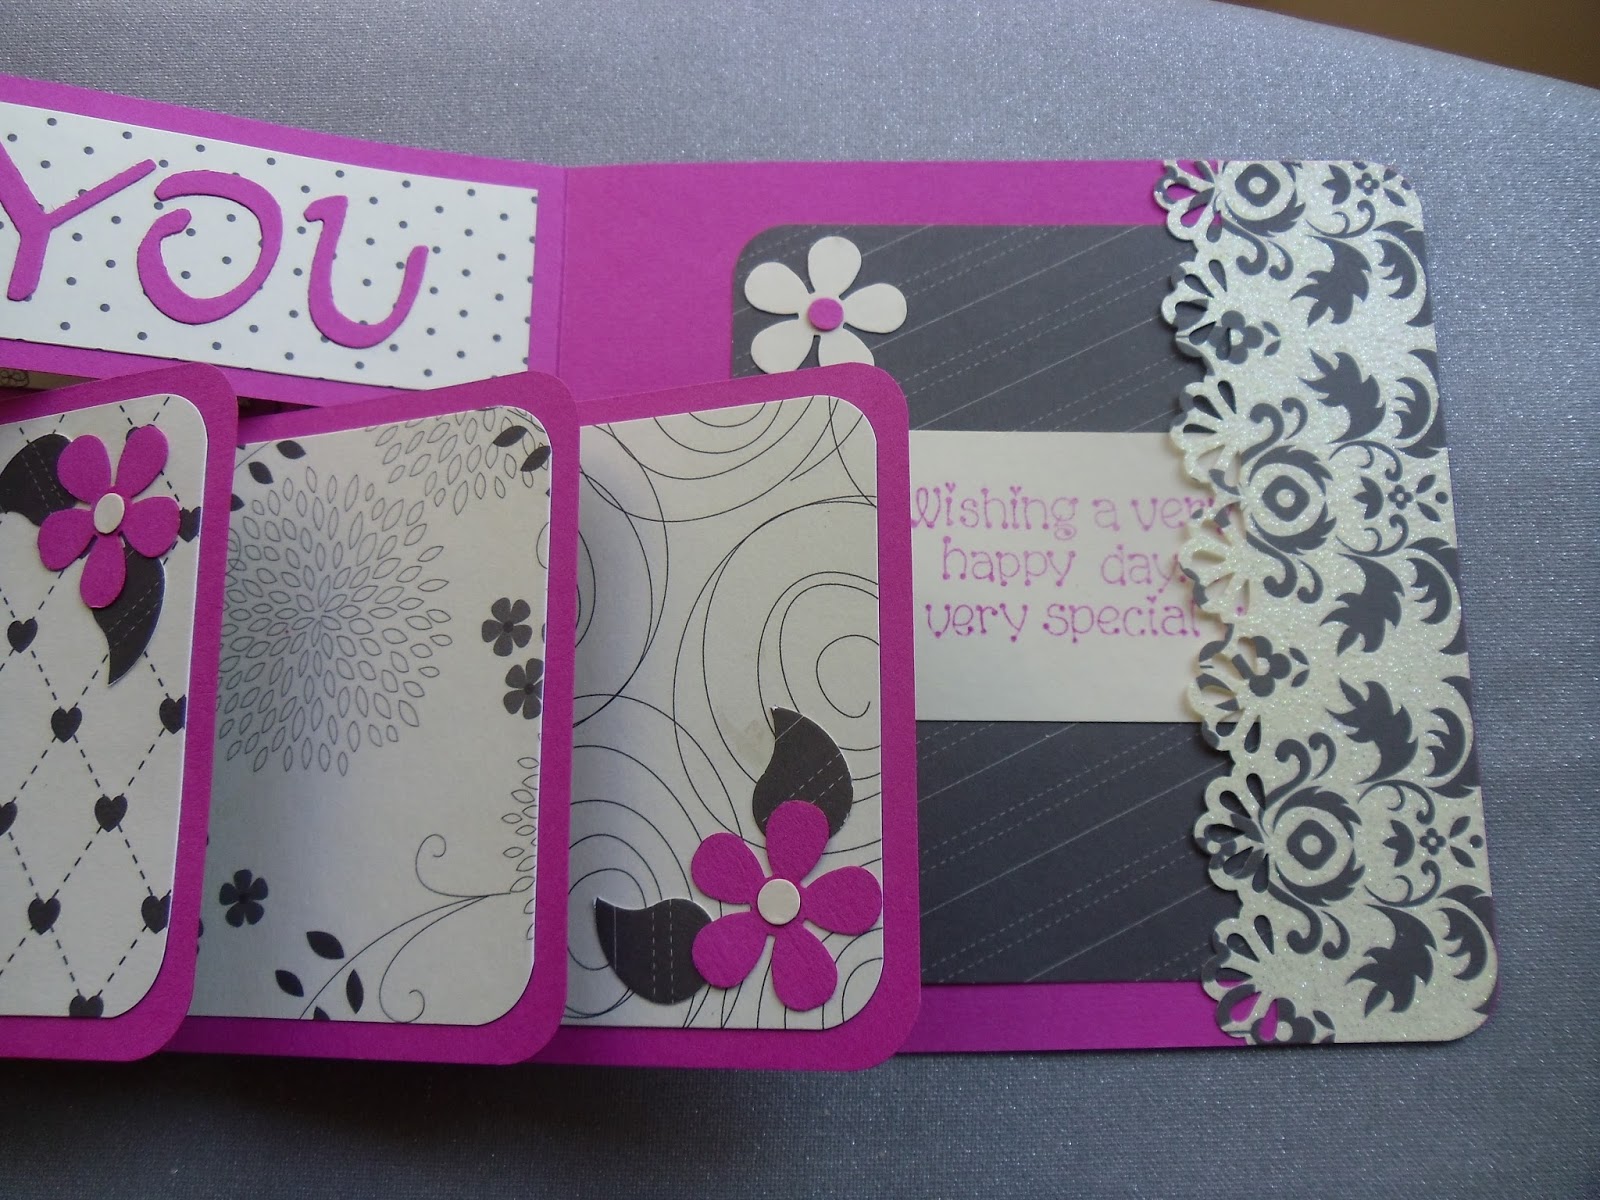
I made two cards, long thin ones to sit on the upper two sections of the card when it is unfolded. Don't fix the centre section card just yet, just in case you decide to add brads as the card will cover the brad wings. Try using contrasting colours.... it adds so much more interest. The lower section, when opened, I matted a piece of white, giving me an area to write my own personal message.
There are many areas where you can add mats and embellishments. Fold up from the bottom. I added two flower brads, which I could tuck the flap under to close the envelope. Alternatively, you may use a magnet, or ribbon to tie it closed.
Have fun :)
Christine
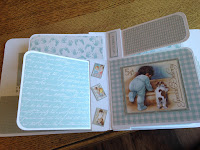
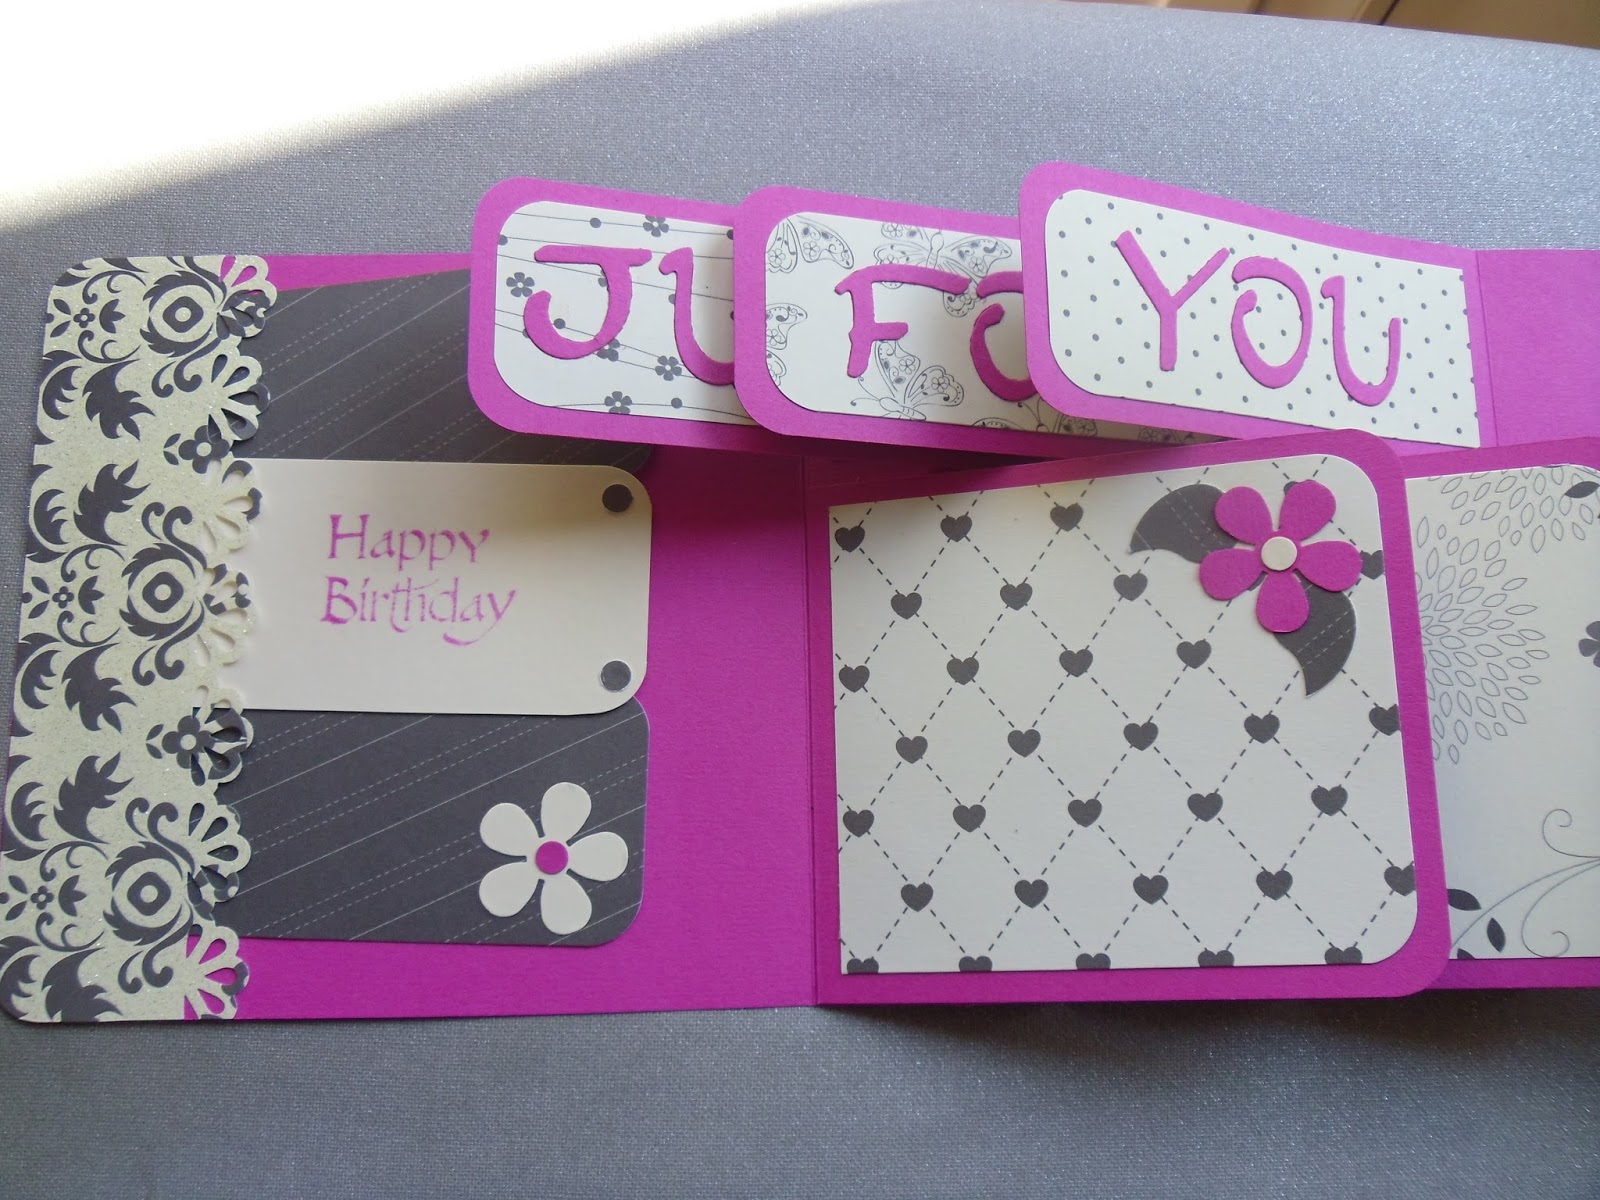
 This delightful project is an envelope and card all rolled into one. The width is 11.5 cms cut down the length of an A4 sheet of card. Rotate the card and score at 11cms and 22 cms, and use the remainder to cut a shape that creates a 5.5 - 6 cms flap. You may choose to draw around a mug or a saucer, or alternatively use a die and run it through your die cutting machine. You will notice from the first two photos on your left that there is a turn, fixed with a brad, that moves over a 'plaque' in order to secure the envelope closed. You will need to take the brad into consideration when decorating the sections with paper mats, as the lower inside section, will have to be added after the brad, in order to cover the brad wings and neaten your project. The 'plaque' was made from a punched shape using a complimentary colour card and a disc of my chosen patterned paper.
 My front face mat was also matted onto a piece of the complimentary card, to tie all of the frontal features together...gosh that sounds almost rude!! The brad and turn (a shape of card that can rotate to form an anchor or 'stop' over the plaque) were then added.
Inside, the upper section houses the card which sits on a mat in the complimentary colour measuring 10.5 x 10 cms.
The card was made from a piece measuring 19 x 9 cms, folded in half to make a card 9.5 x 9 cms. Other mats and decorations were added, staying within my chosen theme and a lining or insert, added in the matching papers. It's a simple but effective project that won't take you long to make, but will greatly reward you when the recipient sings your praises :)
My front face mat was also matted onto a piece of the complimentary card, to tie all of the frontal features together...gosh that sounds almost rude!! The brad and turn (a shape of card that can rotate to form an anchor or 'stop' over the plaque) were then added.
Inside, the upper section houses the card which sits on a mat in the complimentary colour measuring 10.5 x 10 cms.
The card was made from a piece measuring 19 x 9 cms, folded in half to make a card 9.5 x 9 cms. Other mats and decorations were added, staying within my chosen theme and a lining or insert, added in the matching papers. It's a simple but effective project that won't take you long to make, but will greatly reward you when the recipient sings your praises :)
 Have a go...it only takes 2 pieces of card, a brad and some patterned paper.
Keep Crafting !!!
Christine
Have a go...it only takes 2 pieces of card, a brad and some patterned paper.
Keep Crafting !!!
Christine
Today I wanted to share a natty little box that houses 6, 4" square cards and envelopes. It was something a friend shared in Thursday craft group a few weeks ago.
I believe it was from a magazine that she had purchased. The main body of the box is made from a sheet of A4 card, cut to 17 x 25 cms. The score lines are marked with the dashed line, and the solid pieces are to be cut away. Use a reasonable strength of card to protect the contents within. Fold into shape and use a good adhesive to secure the sides.
The lid is oddly sized, as you need the extra couple of millimetres to allow for it to slot over the box body. So a piece measuring 9.2 x 17.2 cms, scored at 3 cms from each edge, and solid notches removed. Again make up into shape using a strong adhesive. Make sure the lid correctly fits the box body before you start decorating it.
I kept it simple, using the fabulous Floral Pavillion papers by First Edition. I measured each of my exposed surfaces, and made a mat for each which was slightly smaller. You may decide to ink the edges, or....before you stick it together, in it's flat position, you may decide to ink it all and decorate with stamps instead.
Using the same card as that of the box itself, I cut 6 cards measuring 10 x 20 cms and scored them in half making 10 cms square. I kept it quite simple, as these papers speak for themselves. I made a slightly smaller mat for each, rounded the corners and trimmed each with different peel-offs. ( I aren't a peel-offs lover, but they do have their place now and again. Plus I have an abundance that seem to just sit collecting dust !!!!) I used a die to punch a small shape to add to each, and just selected 2 complimentary colour inks that worked with my chosen papers. I kept my
sentiments quite generic, as I felt this would make a nice gift for someone to have cards handy when they just want to let someone else know they are thinking about them, for whatever reason.....'Thank You', 'Just to Say', 'With Love'. I happened to have these amongst my vast array of stamps, but didn't have one for the front of the box, so I chose a similar (not quite) coloured pen to the pink ink, and wrote 'Cards', mimicking the font as best I could..

I then made 6, 4" square envelopes, using 120gsm bright white copier paper. It's a good enough weight for an envelope. I started with pieces measuring 6 1/2" square (easily cut from A4 sheets) and used the Crafters Companion enveloper board. You can make envelopes by simply folding in all your points of the square, making sure you centre area measures the required amount, rounding the corners, and fixing the bottom up and over the two sides.
Have fun !!!
Christine
For those of you who know me personally, you know that I
(a) Love all messy art and craft play - the messier the better
 (b) Want to preserve a legacy of memories, just in case I start losing my memory in my latter years, and also so future generations can get a glimpse into our lives in this time.
Now I am a scrapbooker, which is an ideal way of preserving and showcasing memories and photos, but I also love art journalling. It allows different channels to scrapbooking. It's more personal in a different kind of way......it's often more about 'what makes us tick' as an individual rather than capturing a memory or a moment in time. It has proved to be therapy over the years. For example, we were in a bad car accident some years ago, and even though the physical 'scars' had healed in time, a year later, the psychological scars were still very strong. It was almost as if I wasn't allowing myself to forget how lucky we were to have survived, that I was re living the trauma over and over again. Once I had journaled it, thus have a written record should I ever forget, I felt an enormous sense of relief and was able to move on. I haven't shared any photos of these, or other personal pages. We don't necessarily have traumas in life, or even wish to remember them. But I wanted to say that journaling can be about anything. It could be a quote or a saying...as in the two photos above, or, as
(b) Want to preserve a legacy of memories, just in case I start losing my memory in my latter years, and also so future generations can get a glimpse into our lives in this time.
Now I am a scrapbooker, which is an ideal way of preserving and showcasing memories and photos, but I also love art journalling. It allows different channels to scrapbooking. It's more personal in a different kind of way......it's often more about 'what makes us tick' as an individual rather than capturing a memory or a moment in time. It has proved to be therapy over the years. For example, we were in a bad car accident some years ago, and even though the physical 'scars' had healed in time, a year later, the psychological scars were still very strong. It was almost as if I wasn't allowing myself to forget how lucky we were to have survived, that I was re living the trauma over and over again. Once I had journaled it, thus have a written record should I ever forget, I felt an enormous sense of relief and was able to move on. I haven't shared any photos of these, or other personal pages. We don't necessarily have traumas in life, or even wish to remember them. But I wanted to say that journaling can be about anything. It could be a quote or a saying...as in the two photos above, or, as
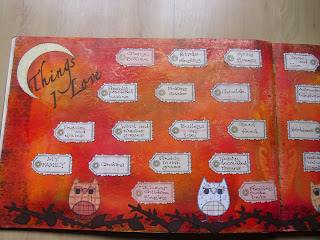 in the photos to the left something that makes you...YOU. These particular pages are things I love and things I hate (in other words things that make me 'tick'). This could be your favourite things, why you don't drink coffee or cringe at brussel sprouts. It could be some jounaling about being taken for granted by those around you - feeling like a slave, or perhaps the trials and tribulations of motherhood. Maybe you could journal about a star that you are in awe of (Marylin Monroe, Brad Pitt) or how a particular colour makes you feel.
 The possibilities are endless !! Have fun playing and creating backgrounds, with acrylics, watercolours, spray paints, watersoluble, crayons/pencils. There is no right or wrong and there aren't the usual constraints when producing pieces for cards etc. It is for your own purpose and pleasure. Once you've explored and created your background, start collaging on top. You could, if you are very artistic, paint your pictures in. If you don't have stamps that relate to what you are journaling about, look through magazines and incorporate them into your pages, even if you 'alter' them to add pizazz.
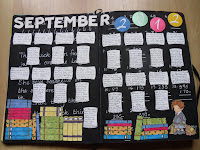
The photos below are a few from a FaceBook group I posted on each month, until two months ago when I simply was too busy to keep up with this. It's called Art journaling Calendar challenge 2013. It was started by Kate Crane of the Kathyrn Wheel some years before and moved to Facebook in 2013, but has not changed it's name due to FB regulations. Anyway, if you are new to journaling, this is a great way of getting into it, as it gives you a purpose and only requires you to produce a page once a month. There is lots of inspiration from the other contributors that will give you ideas. The idea is you produce a background and can theme it if you wish, to correspond with a particular month and year, and incorporate the correct number of sections where you can journal something that has happened on each of the days of that month. It's lovely to look back and read what you were doing 2, 3 , 4 or even 5 years before...even amusing at times, as it's surprising what you forget you've been up to and how quickly time has passed.


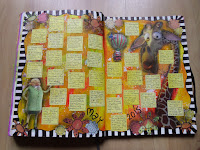
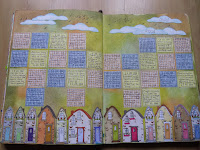
 Just a few of mine, playing with different background mediums, and collaging with digital images, magazine clippings, rubber stamps and even some painting and drawing. A variety of layouts, some themed for that month, others not.
The main thing is to have a go and enjoy what you are doing. It is meant to be a pleasure after all.
Just a few of mine, playing with different background mediums, and collaging with digital images, magazine clippings, rubber stamps and even some painting and drawing. A variety of layouts, some themed for that month, others not.
The main thing is to have a go and enjoy what you are doing. It is meant to be a pleasure after all.
Christine
 I have, over the years made many different style flag books, but whilst browsing Pinterest, I saw a photo of a similar one to this, and decided to make some....and some friends have shared theirs too....so lots of photos today crafters. It is based on a design by Lori Coughlin if you would like to view her original one.....(http://DelightfulDesignsByLori.blogspot.com).
I began by cutting 2 sheets of A4 card (in their portrait position) to 15 cms wide. Then I trimmed one to 27.3 cms long and the other to 19.8 cms. The odd measurements are to allow for the bulk of the scored concertina sections, but still retain the same depth of the concertina folds. I then scored down the shorter depth of the longer of the two pieces. I joined them, as shown in the top photo. This forms the basis of your book.
Then I cut 3 of each size of the flags, 11 x 9.9 cms & 11 x 4.9 cms. Again, the odd millimetre shorter in the depths is to allow for the flags to open and close freely. The top, narrower flags I attached to the back face of the concertina folds, and the deeper flags were attached to the front face of the folds. This doesn't matter if you do it this way around, as long as you attach the upper ones to one face and the lower ones to the opposite face.
Then I made a belly band from the left over strips of the first two A4 sheets, joining a 5 cms piece from one to the end of the other strip (now covered by the flower) This was scored at 7, 7.5 & 23 cms. Decorate as you wish...you could add side or base pockets to the inside of the covers and add some tags. Embellish to your hearts desire...but simply have fun !!! Don't forget to scroll to the bottom as their are lots of photos for you today.
I have, over the years made many different style flag books, but whilst browsing Pinterest, I saw a photo of a similar one to this, and decided to make some....and some friends have shared theirs too....so lots of photos today crafters. It is based on a design by Lori Coughlin if you would like to view her original one.....(http://DelightfulDesignsByLori.blogspot.com).
I began by cutting 2 sheets of A4 card (in their portrait position) to 15 cms wide. Then I trimmed one to 27.3 cms long and the other to 19.8 cms. The odd measurements are to allow for the bulk of the scored concertina sections, but still retain the same depth of the concertina folds. I then scored down the shorter depth of the longer of the two pieces. I joined them, as shown in the top photo. This forms the basis of your book.
Then I cut 3 of each size of the flags, 11 x 9.9 cms & 11 x 4.9 cms. Again, the odd millimetre shorter in the depths is to allow for the flags to open and close freely. The top, narrower flags I attached to the back face of the concertina folds, and the deeper flags were attached to the front face of the folds. This doesn't matter if you do it this way around, as long as you attach the upper ones to one face and the lower ones to the opposite face.
Then I made a belly band from the left over strips of the first two A4 sheets, joining a 5 cms piece from one to the end of the other strip (now covered by the flower) This was scored at 7, 7.5 & 23 cms. Decorate as you wish...you could add side or base pockets to the inside of the covers and add some tags. Embellish to your hearts desire...but simply have fun !!! Don't forget to scroll to the bottom as their are lots of photos for you today.


 Christine


