

This card can be made from any sized square or rectangle. It is important to note that your finished card will be one quarter of the original size, and because of this I have not worked on anything less than an 8" square. The one shown opposite is using a 12" square of patterned double sided. If you are using a patterned paper, make sure it is not directional, otherwise when folded, it may appear the wrong way up !! You can always use plain heavy paper or thin card, then line areas to give it interest.
Regardless of the size, or square/rectangle, begin by folding edge to edge in both directions, so you have four obvious quarters. Make sure your folds have sharp creases, unless you are using a card stock that cracks easily. But should it crack, sponge a little ink around the folded edges to give it an 'aged/distressed' look, as though you intended to do that all along.
 In the first photo, you will see the top left corner folded down to within 1cm of the centre crease, and the bottom right folded up about half way up that bottom quarter. Crease sharply then cut along the centre line from the right hand edge to the centre point.
To fold up, and to get a feel for the folding order...FOLD..
Bottom right over to the bottom left
Bottom left up to top right
Top left over to top right
 This should now look like photo 2. Because there is now bulk with the folds and creases, you may need to trim any slithers that overhang and thus retain a neat shape.
Stick down the diagonals and attach some border edges (photo 3)
Place tape in poisitions shown (photo 4), then seal up in the same order as that described above for folding up.
 Your card should look similar to this.
Now all you have to do is decorate it. Tags are perfect for the pockets. They can provide a space to add a verse/sentiment, or photographs and perhaps some journalling to make a truly unique and personal card.

I added a ruby and a cream tag into the two front pockets and decided to stamp and emboss 'verses' onto each.
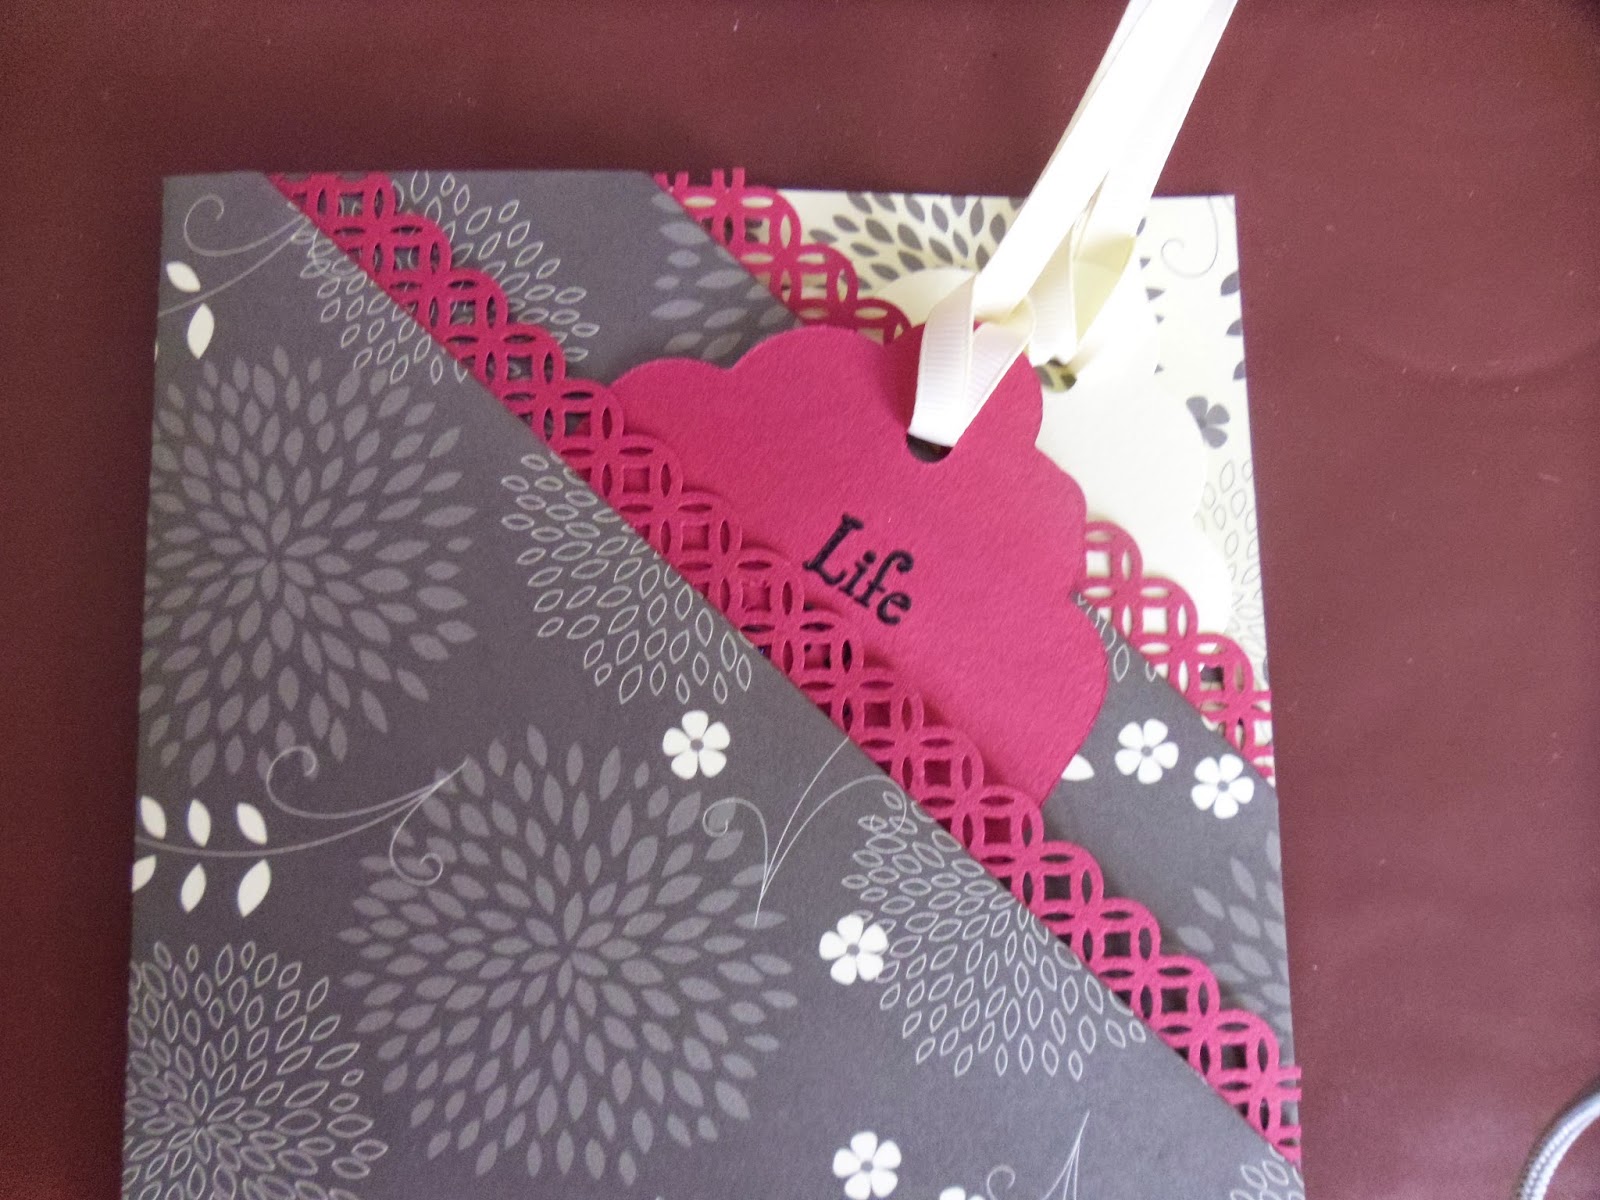
 I then used a third tag for my mat in the centre. I kept this quite simple as the paper I used (First Edition Noir et Chic) was quite busy.
This is another 12" square, but was only single sided. I lined the back pocket with a pink check paper, and the inside with yellow card to give it added strength.


Happy Crafting !!!
No comments:
Post a Comment