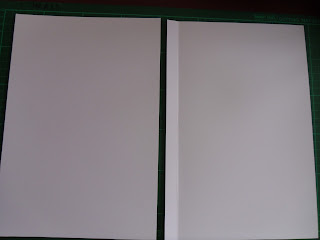
A number of weeks ago a young lady came to purchase some sheets of A3 card to make boxes to hold large cards she had made. I suggested that she could actually make them from A4 with very little waste. As I had a special anniversary card to make, I decided to share how I do this. The lid of the box is the largest component, so this uses a full A4 sheet. As my card was quite shallow, I only allowed 1 cm sides. If you need deeper sides to accommodate your embellishments, then you will have to adjust your card to fit inside.... So, for the lid, I scored all sides with a one cm margin, cut two semicircles on the long sides (lid only - to allow you to lift the lid off easily), then removed notches, in order to turn in and hold the box shape.

I glued these tabs, fastening them to the opposing sides, and holding with clips until fully dry.
The base is made by the same method (minus the semi circles) but begin with a piece of A4 than is trimmed down 2mm on a long and a short side. This allows the base to nest within the lid. If using thicker card, you might need to make this 3mm.
Now the card itself is determined by the size of the box base,a tad smaller just so that it can be put into, and taken out of the box quite easily. As my sides were only 1 cm, this gave me a card size of 18.5 x 27.3 cms. The base is completely flat, but I scored the front 1.5 cms in from the spine edge (to allow it to open easily.
I decorated all my card, printed and decorated my inside sheets, then clipped all the layers together, to make sure they lined up before I punched some holes along the spine. The inside layers were also scored 1.5 cms at the spine edge. I spaced my holes approx 2 cms apart, starting in the centre.

Because I intended tying a bow in the centre, that's where I began. I did a running stitch with narrow chiffon ribbon, to one end.
I then came back up, making a back stitch, back to where I began at the centre. I continued with a running stitch to the opposite end, and a back stitch to the centre.
This is what it should now look like.
And I tied a bow, as I had intended.
This is the finished card and box.
....And a close up. I stamped and heat embossed in silver. For the writing I used an embossing pen. I wrote what I wanted onto some parchment, and when I was satisfied, I wrote over the letters on the parchment reverse, then transferred it to my card by writing over the letters on the parchment front again. I was left with faint pencil letters on my card, which I wrote over using the embssing pen and covered in silver powder which covered any pencil. With the addition of some pearl paper flowers, slightly shaped/rounded with a ball tool, some pearls and mini gemstones (from a nail art kit), and I was pleased with the result.

These are the inside pages.
I finished by wrapping in two lengths of silver tissue paper, stamping and embossing on the box lid, and tying with the same lilac ribbon.


No comments:
Post a Comment