So let's get going.....
 With the pattern side up, begin by folding a sheet on paper in half vertically. Open out and fold in half horizontally. Open out again, and flip over so the pattern side is now facing down. Now fold the paper in half diagonally. MAKE ONLY ONE DIAGONAL FOLD. Open back out, flip over, and using these creased lines, you should be able to manipulate your paper in, thus creating a quarter of the original size (see photo to the left).
 Repeat with another sheet, BUT with your third sheet you will need to do all the folds with the opposite sides facing. This will create your centre panel.
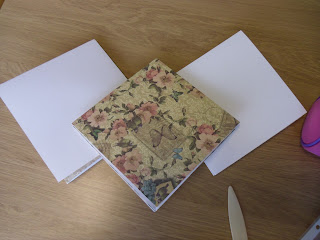
 If you look at the final photo this week, you see I have opened out all the pieces, and attached the centre one, on top of the two outer pieces, fastening together on the complete quarter squares that do not contain a diagonal score line.
 So come on...get busy and be ready to start decorating it next week.
 Christine


No comments:
Post a Comment