Mainly photos this week crafters, to show you my example....but don't be limited....let your imagination flow and do whatever inspires you.
I made some diagonal pockets, and allowed an extra 1cm (gusset) to attach to my album. I also used border punches to edge them.
This is a close up in the finished album. You will notice I also finished off with punched borders, where the pages met the outer cover.
I made some belly bands, matting a strip of complimentary patterned paper onto a wider panel of card that had been edged either side. Belly bands are attached to your work at the two outer edges to allow you to slot things under them, that they will hold in place.
I also punched some circles and halved them, just to add to the effect. Like I said....do whatever inspires you.
Here's a close up.
 |
Some I tucked in the pockets....still plenty of space to add photos.....
....and some, under the belly bands.
.
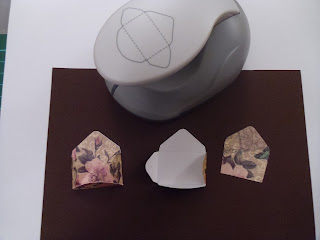
I used an envelope punch (if you don't have one you could simply fold paper to make small envelopes) I also punched additional ones and cut down to create a lining as I was using single sided paper.

I stamped letters onto small tags, a few words onto strips of cards, and also to go inside the mini envelopes, inking around all the edges.
Don't be defeated with finding 'words'. you will be surprised at what you will find among your stamp stash. For instance, you may find an inspirational word within a verse stamp - mask off words that you don't wish to use.
You will need to make your covers slightly bigger than your final 6" folded project (or 4" if starting with 8x8" papers). I used thin grey board, but strong card would work. Make two, wrapping a complimentary sheet of paper around each so that all edges are covered.
Loosely wrap a length of ribbon around, which will allow you to be able to fasten into a bow. Fix on the front cover only, with a piece of double sided tape.
Make a complimentary decorated mat to cover this tape. In my example, this is for a 50th birthday, but you could add any decorative design or even a photo.
This is the finished (except for the photos) design.....you can tell I like symmetry !!!
And a few close ups.
So come on...what are you waiting for. And don't forget to send me a photo of your finished project so I can add them to the inspiration page of my website.
Email: divinecrafting@btinternet.com
Enjoy !!
Christine


No comments:
Post a Comment