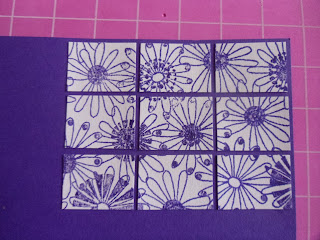
 This is such a simple card, but I'm sure you will agree, an effective one.
 Begin by selecting a large stamp, the bigger the better. I've used a background stamp, but have on many occasions used the larger House Mouse stamps (there are occasionally some squares/rectangles which don't capture any of the image, but that really doesn't matter). Also, I have simply stamped in a coloured ink, but don't let this be your limit. A beautifully coloured scene, or even a background created for example, by splatters of inks, and then cut up, are effectively stunning.
Trim all of the excess, and also any extra to make it easily divisible. Now, now !!! Don't get in a panic at the thought of fractions from your time at school. As long as you can divide the measurements by 3, on both sides, you will be fine. Mine measured 12.5 x 9.5 cms, so I trimmed a little more to make it 12 x 9, which both 12 and 9 can be divided by 3.

So, when cut up, my 9 rectangles measure 4 x 3 cms. IT IS IMPORTANT THAT WHEN YOU ARE CUTTING THE SQUARES/ RECTANGLES, YOU KEEP THEM IN THE SAME ORDER otherwise you might have a bit of a jigsaw to solve.
Keeping them in the same order, stick then onto a piece of complimentary coloured card, making sure you leave the same gap width all around the edge and between the pieces.
Trim as necessary and mount onto your base card. Embellish and decorate as you wish.
Christine


No comments:
Post a Comment