Monday, 25 July 2016

Herringbone Pocket Card


I began with a piece of card A4 length x just under 15 cms (or 12" x 6"), and a second piece Just under 15 cms square (or a 6" sq).  The larger piece needs to be scored to make a gatefold card.  The smaller pieces need to be cut into two, diagonally.


Attach the two triangular pieces to the front 'gates', and trim. ***Keep the waste***


You should have something that looks like this.


Next I created some mats.  You will need two squares of 5 3/4" (mine are purple) and two squares of 5 1/2" (mine are a check and a floral pattern).  The inside square mat is pretty straight forward.  Before you stick  your diagonal mats, match up at the right angle point and reduce along the long diagonal edge, so that you have an even border all the way round.

It doesn't matter which way you overlap your diagonal gates, but you need to secure your first side at the bottom, so that whatever you put in the pocket, doesn't fall out.

  
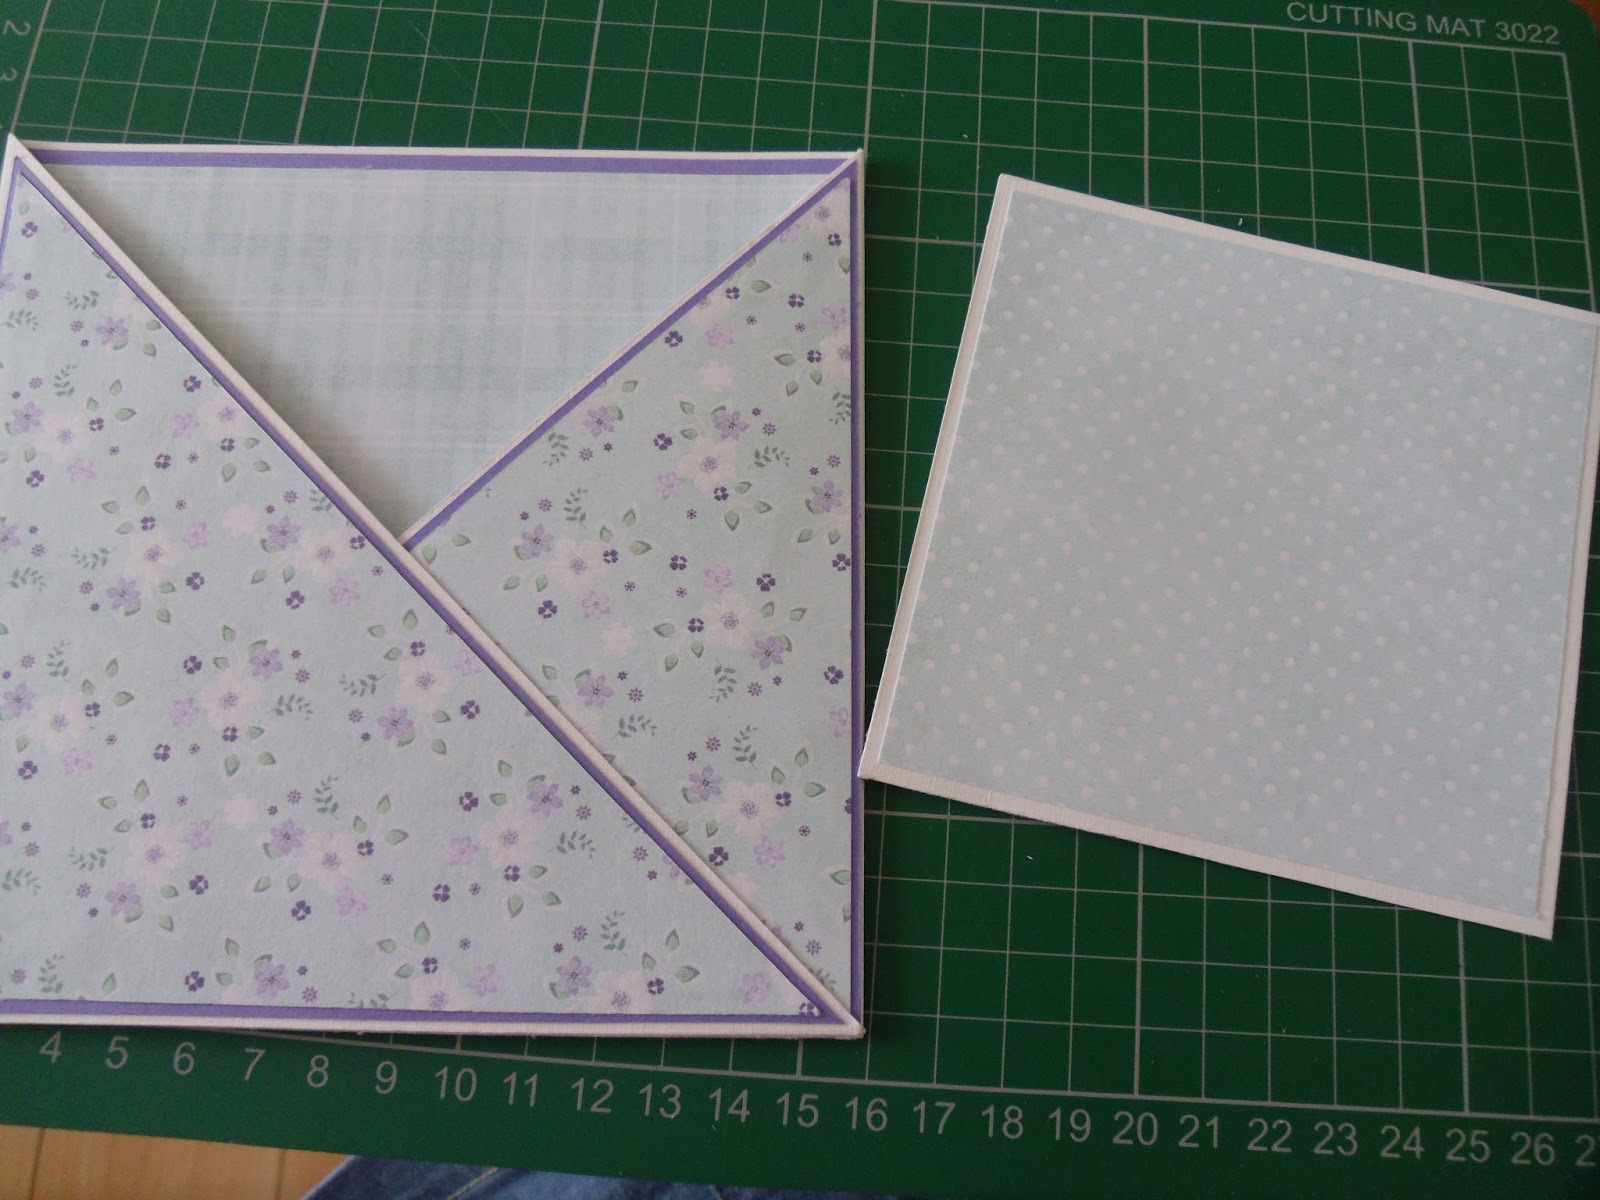
Attach one of your diagonal mats, then overlap the second gate, sealing at the bottom part only (see photo on left)


Attach the second diagonal mat, and you should have something that looks like this.

Now to be able to stand it up, you need to create a support for the back.  Remember the 'waste' when you trimmed the gates earlier ? - score approximately at 1cm (3/8"), and trim a diagonal off the bottom, as shown in the picture below.  If you trim a deeper diagonal, the card will tilt more - this is personal preference, but I would suggest you don't overdo it, as you can always take a little more off if required.


Attach by the scored strip.  These are the side and back views.


I made a card for the inside 11 cms square (4 3/8") with mats cut to 4 1/8" & 3 7/8" squares.  The smaller one I made using the same base white card, as I intended stamping a verse on it. 


For the tab top, I made this by folding some of the purple paper and punching the majority of a circle, so the straight edge towards the top was at the fold.  If using card, you will have to make two matching tabs, otherwise you might ruin your paper punch.  I then used my cutting mat to mark where I was going to remove.  Mine lined up nicely with the 1cm marks, but you can adjust, depending on the size of your circle.  I used the circle punch to remove these sections, lining up with the pencil marks.


I attached it to my insert, which I stamped with a verse, and also some pale inked flowers, as not to detract from the verse, just to add a subtle background and remove some of the starkness.


With the addition of a Magnolia figure, coloured in water colour pencils, and blended with a damp brush......Et voila !!

Enjoy,
Christine

Monday, 18 July 2016

Rocker card


Another quick and easy card for you this week....you can tell who's busy can't you !!!!

Begin by scoring a piece of card in half.  Now bearing in mind that this score line will need to fall in a diagonal position, it is best turning the card until you think it is where it needs to be....try and visualise the finished card.  Then draw a line in the other diagonal direction, from what will be the top point, that looks as if it is flowing at a similar angle.  This is your cutting line.  When you have cut something that resembles a triangle at the top, use a plate or something similar to draw a cutting line for the bottom 'rocker' scoop.

As you can see in the picture on the left, the card only sits on a small part of the lower edge - that which is most prominent - this allows it to rock from side to side.  You will notice that I have put the sentiment on a mat at the top.  Partly because I wanted to add a sentiment, but more importantly, adding a little weight at the top (evenly spread over the centre so that it is balanced) which enables the rocking to retain momentum for a while before you have to set it going again.

The photo on the left shows a close up of the lower scoop. 


I decorated my card simply, using the shape of the base card to graduate down for my mats, first in mulberry paper (wet and torn for a wispy edge) then a piece of patterned paper.  I finished with a Magnolia girl, stamped, coloured and cut out and slightly domed and attached with silicone glue to give a little dimension.  


At at the top, I punched 2 holes to thread a piece of ribbon through, tied in a bow, cured the ribbon around some scissors, and added some punched card flowers, fixed back to back on the ends of the ribbon to weight it to hang down.

Have fun....sorry I must dash
Christine

Monday, 11 July 2016

Teatime Tote


This is a great little gift than everyone will be able to make.  It isn't complicated.  Simply follow the instructions and pass it on to someone with love.


 It can be made from the size of an A4 piece of paper.  It does look better if you use a double sided paper, but there is nothing to stop you sticking 2 thinner, single sided sheets together.  A4 size is 21 cms wide by approximately 29.8 cms

The red diagonal lines in the four corner areas will need to be removed after you have scored all lines indicated by a dashed line, and cut on the solid lines.

So in the landscape position, score 2.5 cms; 2.5 cms; 7.5 cms......and repeat from the other end so that the 'odd amount leftover' will become the base.

In the portrait position score at 7 cms; and 7 cms, so you have 3 equal sections.


When you score the diagonal lines (this is the landscape view), on the 7.5 cms width, start your score 1/2 cms within the score line. 

 After you have removed those 4 corner sections, fold in the 4 diagonals.


Flip over and turn back the outer 2.5 cms sections.


 Flip back and fold in the left third.....


......then fold in the right third.


Keeping these folds on the outside, pull one end around to meet the other, and faster with a clip or peg.


Grab your tea bag, and if you wish, you could type or write a little rhyme and cut out in a shape of your choice.


Put the tea bag in one pocket and the rhyme in the other.....then pass it on with love to someone you feel may need a lift and a smile.

Christine

Monday, 4 July 2016

Caught in a Crystal Panel


You will need:
Acetate
Black Stayzon ink
Johnsons Klear floor polish
Tissue paper (white)
Acrylic paints
Rubber stamps
Paintbrush
Hairdryer
Scissors 


Ink up your stamp/s and stamp onto the acetate, pressing firmly all over to get a good impression....but be careful the stamp doesn't slide **always keep one hand on the stamp.  Let dry naturally.

On the reverse of the acetate, pour a puddle of the Johnsons Klear, taking care it doesn't run off the edges.  Add your chosen acrylic colours, starting with the lightest colour, and gently swirling into the polish.

Crumple up the tissue paper, then loosely open it out and place onto the polish/paint mix.  Dab gently with a brush to make sure the tissue has good contact with the fluid and the acetate.  You are aiming for plenty of wrinkles, but being careful not to move the paints too much more, otherwise they will all merge into one blended colour and you will lose the overall effect.  If you look at mine, you can still see clear yellow and green areas, as well as where it is a mix of the two.

At this stage, you can speed up the drying process, but only with a hairdryer, as a heat tool would melt the acetate and acrylics.  Plus, the polish could be flammable.  When it is thoroughly dry, it just needs trimming and mounting. Voila :)
Christine

Monday, 27 June 2016

Prick 'n stitch


There are an abundance of patterns, often free in magazines, but you could also make your own quite easily.  Basic shapes can easily be transformed with some creative stitching.  Now I aren't very good with a needle and thread, and I was actually banned from needlework at school, well using the machines at least !!

When you've chosen your design, you will need a pricking/piercing tool and a felt/foam mat.  Carefully attach your pattern to some card with some low tack tape, then prick out, using the mat underneath as a buffer.  If you look at the basic stitches in the pictures to the right, you will see the petals have one hole at the bottom, and pierced around each scallop from about half way up.  The stitches are worked in a fan, with each stitch always being worked through the hole at the bottom of the petal.  The centres are stars.  Again working each stitch into the centre hole, and into each hole around the circle.  The leaves and stem was a basic back stitch.

These are just a few basic stitches, but there is nothing to stop you being more creative and producing other patterns.  Have fun experimenting.  Whilst I consider myself to be abysmal at sewing, I did find this very therapeutic and was quite chuffed with the outcome.
Christine

Monday, 20 June 2016

Art, Love, Beauty - using alcohol inks


This week I thought I would play with some alcohol inks...and I'm sure I will at some point in the future, share more.  I've purely called this blog Art, Love, Beauty because of the Cherrypie Art stamp I used to create it. 

For this technique you will need:
Glossy photo card
A busy stamp (florals would work well if you don't have an arty style stamp)
A selection of complimentary alcohol inks/Distress inks (refiller bottles)
Blending solution
An applicator (with a handle to allow control) with a lint pad attached to the velcro end
Archival ink - black
Heat tool

Dot small amounts of the inks and the blending solution, randomly onto the lint pad.  The Distress ink refillers aren't as strong as the ones sold as pure alcohol inks, so you will achieve differing depths of opacity, and the blending solution does what it says on the label - blends. Then using a tapping motion, stamp the lint surface onto the glossy photo card until you are pleased with the mix.  It's quite forgiving and you can over stamp a section if you aren't happy. You will then need to heat set the inks.  I stamped 3 pieces of photo card as I intended decoupaging layers.

Then using the black archival ink, carefully stamp the chosen design onto each of the pieces of glossy card. Whilst you want a good impression, be careful not to apply too much pressure or the ink will skid on the glossy surface.  These must be left to dry thoroughly, generally this will take several days.

Then it's just a case of cutting out and layering what you wish to be prominent pieces.  If you are using a floral stamp, look at which petal or flower is the most prominent, and give it pride of place with extra layers.  You don't have to be limited to three layers either....whatever you think.

Get playing !!
Christine

Monday, 13 June 2016

Gate Fold Card

Another simple card this week with Father's Day looming and little time to really play :(

As with last week, it's just a case of dividing your card up.  This time you are scoring at 1/4 and 3/4 along the length.  So a 6" square finished card would be scored at 3" and 9"  I have done an A5 finished card, so started with an A4 piece of card.  Now I have a M&F score board which has the score lines marked.  However, don't be deterred if you don't have one.  Just trim the length of your card into something that is divisible by 4.  So in this case, 28cms.  You would then score at 7cms and 21 cms.  As you are only trimming a small amount off, it won't be noticeably smaller than the A5.


Any mats are only attached by one half of their reverse, to allow the card to open.  It doesn't really matter which side, or if you have multiples, you could have them attached to different sides.  I have attached both my greeting and picture to the left front face, but I could have for example, attached the greeting to the right face. The additional circular sentiment is only attached to the picture mat.


Again, follow the basic principles for dividing your card, and you will find endless possibilities. A longer narrower piece to begin with, could produce a landscape card.  Whereas a square piece will create a taller, slimmer card.

Christine