I seem to have a few 50th birthday's coming up, so I decided to make this framed card and share it with you. I first made these style of cards a few years ago, and I cannot remember where the idea came from, but it isn't mine.
For the frame:
Cut an 18 cms square piece of card and from the outer edge working towards the centre, score at 1 cms; 2 cms; 3.5 cms; 4.5 cms & 6 cms. Repeat for all four sides.
The blocked red sections marked on the diagram to the left are the sections to be removed, and the additional red lines are CUT lines. You will also notice in the lower right corner, I have marked (in black) further diagonal cuts that make the tabs to hold the frame. This should be done for all four corners.
When you have removed the specified sections, made the additional cut lines and sharpened all your score lines, you should have something that looks like the photo on the left.
When you fasten it into the 'frame' shape, it should look something like this underneath.
And like this on the upper surface.
The base card is approximately a 15 cms/6 inch square. I cut a 15 cms square mat for the front of the card; a 15 cms square frame that is 1.5 cms deep (keep the cut out), and some 1 cms strips to cover the frame edges, both inside and out.
This is when the papers have been fixed to cover the frame.

And the front of the card waiting for the focal point and frame adding.
I also added the smaller square off cut from the centre of the frame above....waste nothing.
And to complete, I added a decoupaged figure, 50, a few corners and a greeting. Edges can be inked if you wish, or run the chisel edge of a ProMarker (or similar) around the frame, to disguise gaps if you have them.
Christine
I thought I would share an Easter card with you this week, and re visit inking. This uses limited resources and is achievable by everyone.
 I began by 'masking off the edges and at the same time, securing my base card to my work mat to stop it moving about when I am applying pressure when adding the ink. I used masking tape, but because this is quite tacky, I always press it to my clothing (or skin) several times, to make it more of a low tack tape.
You will notice I have only allowed the tape to cover approximately 1 cm of the card's outer edge. I also punched a circle of card (to represent the sunlight) and added a little masking tape underneath, to hold it in position.
I began by 'masking off the edges and at the same time, securing my base card to my work mat to stop it moving about when I am applying pressure when adding the ink. I used masking tape, but because this is quite tacky, I always press it to my clothing (or skin) several times, to make it more of a low tack tape.
You will notice I have only allowed the tape to cover approximately 1 cm of the card's outer edge. I also punched a circle of card (to represent the sunlight) and added a little masking tape underneath, to hold it in position.
 ....and more tape. This is to give me a horizon line, to separate the land and the sky.

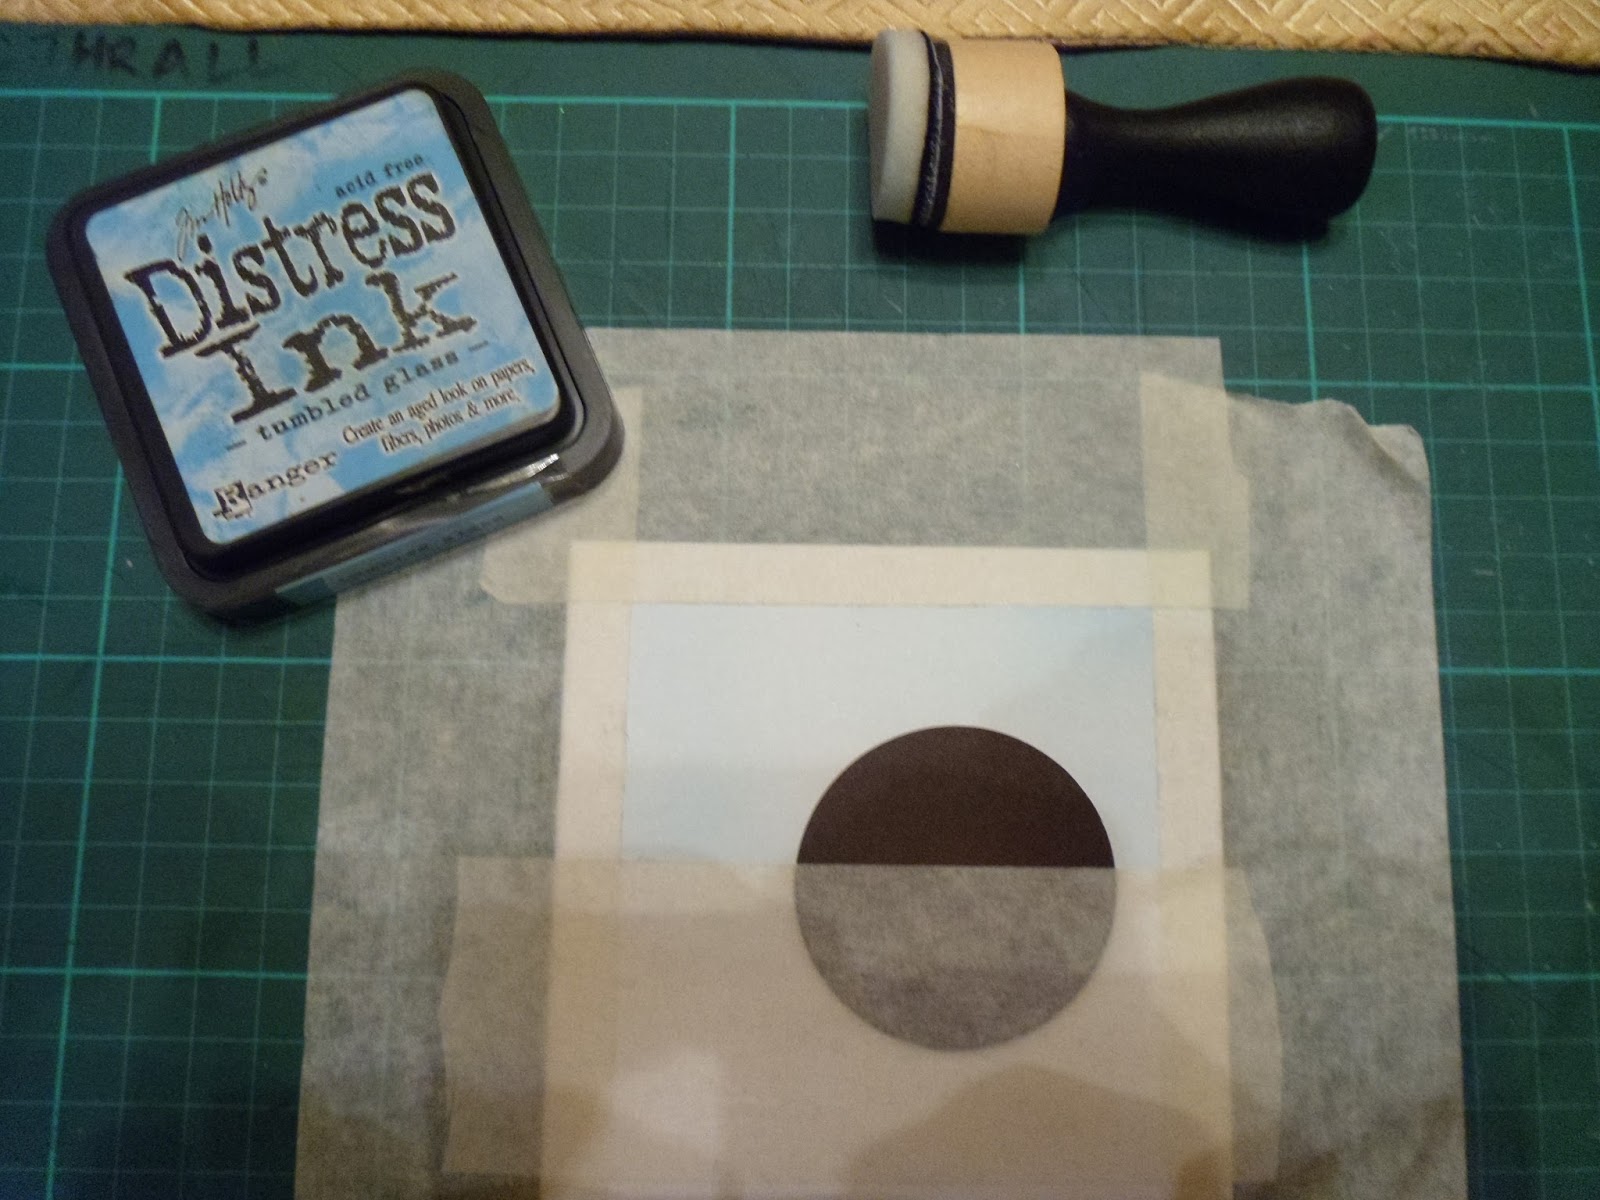
 I inked my sky first. I used distress ink - Tumbled Glass. Distress inks are fabulous blending inks. They are a water based dye ink. When I pick up ink from the ink pad onto my foam applicator tool, I dab it off onto a piece of plastic, so that the colour is not initially too strong. You can always add more, but you can't take it away !!. I swirl lightly at first, and when you get this swirling action going, you can then add more pressure to deepen the shade. Some crafters like to angle their applicator tool, and work from a craft mat and gradually onto their work. You will have to experiment as to what suits you best.
I carefully removed the 'horizon' masking tape (you can just about see the blue) ...
I inked my sky first. I used distress ink - Tumbled Glass. Distress inks are fabulous blending inks. They are a water based dye ink. When I pick up ink from the ink pad onto my foam applicator tool, I dab it off onto a piece of plastic, so that the colour is not initially too strong. You can always add more, but you can't take it away !!. I swirl lightly at first, and when you get this swirling action going, you can then add more pressure to deepen the shade. Some crafters like to angle their applicator tool, and work from a craft mat and gradually onto their work. You will have to experiment as to what suits you best.
I carefully removed the 'horizon' masking tape (you can just about see the blue) ...
......and re applied, covering the edge of the blue, butting up to the line created by the blue ink. I then applied a yellow ink (fossalized amber), removed the tape again, and applied a light touch of the yellow around the upper part of the circle mask.
I
continued, applying crushed olive to the lower part, and blending it
into the fossalized amber, so the two colours seamlessly blended
together.
 This is how it looks when the circle mask had been carefully removed.
I carefully removed all the other masking tape, peeling it back slowly so that it did not tear my card. I then stamped a spray of seed heads, but it could be flowers, and an Easter greeting.
You have a little time to still make some Easter cards....so get cracking !!!! (...so glad I didn't put an egg on the front, you would have thought I was being funny ha ha)
Christine
This is how it looks when the circle mask had been carefully removed.
I carefully removed all the other masking tape, peeling it back slowly so that it did not tear my card. I then stamped a spray of seed heads, but it could be flowers, and an Easter greeting.
You have a little time to still make some Easter cards....so get cracking !!!! (...so glad I didn't put an egg on the front, you would have thought I was being funny ha ha)
Christine
As it was Mothering Sunday yesterday, I thought I ought to get my act together. Although I confess, I had already bought cards for our mums....I know - naughty me !!! ..... but I also had a craft fair on Saturday and thought I ought to add a few to my eclectic mix of altered art and home decor goodies for sale.
I have been so busy lately, so I apologise that this is not a tutorial style blog, but more of a revisiting of the collage blogs from a few weeks ago.
The papers and stamps used are from Lili of the Valley. I simply mixed and overlapped papers , some were matted onto complimentary card, along with die cuts for the sign and bracket in the same card. I decided to stick to a purple and aqua colour palette, and when I came to colouring my stamped image, I used ProMarkers that fitted within this range. A few pearls and a little chiffon organza and Voila - a simple but stunning card (even if I do say so myself), fit for any mum, who of course is wonderful and very deserving of being spoiled
Hopefully I will have an Easter card to show next week....and I hate to mention it, but I already have Christmas in mind.
Christine
Mainly photos this week crafters, to show you my example....but don't be limited....let your imagination flow and do whatever inspires you.
I made some diagonal pockets, and allowed an extra 1cm (gusset) to attach to my album. I also used border punches to edge them.
This is a close up in the finished album. You will notice I also finished off with punched borders, where the pages met the outer cover.
I made some belly bands, matting a strip of complimentary patterned paper onto a wider panel of card that had been edged either side. Belly bands are attached to your work at the two outer edges to allow you to slot things under them, that they will hold in place.
I also punched some circles and halved them, just to add to the effect. Like I said....do whatever inspires you.
Here's a close up.
I made some journal cards, adding interest with a corner punch and matted them on the same brown card I had decided to use as my accent colour.
Some I tucked in the pockets....still plenty of space to add photos.....
....and some, under the belly bands.
.
I used an envelope punch (if you don't have one you could simply fold paper to make small envelopes) I also punched additional ones and cut down to create a lining as I was using single sided paper.

I stamped letters onto small tags, a few words onto strips of cards, and also to go inside the mini envelopes, inking around all the edges.
Don't be defeated with finding 'words'. you will be surprised at what you will find among your stamp stash. For instance, you may find an inspirational word within a verse stamp - mask off words that you don't wish to use.
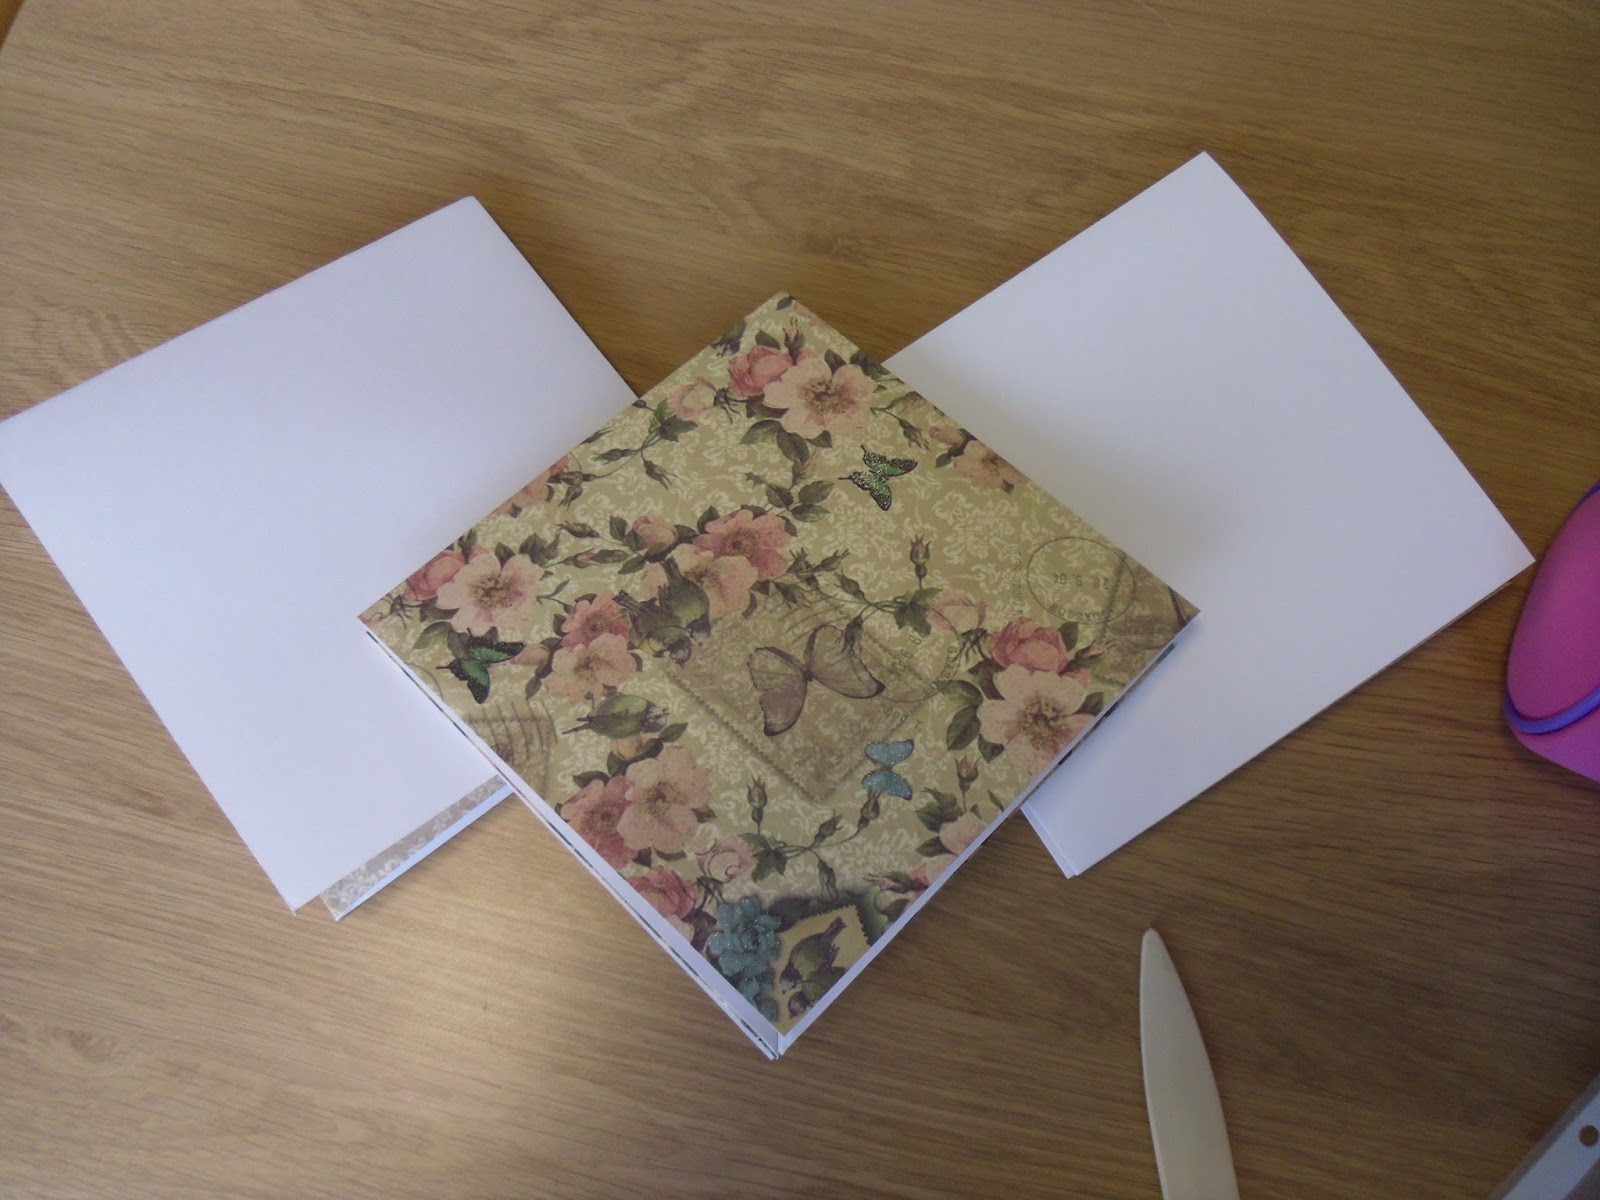
You will need to make your covers slightly bigger than your final 6" folded project (or 4" if starting with 8x8" papers). I used thin grey board, but strong card would work. Make two, wrapping a complimentary sheet of paper around each so that all edges are covered.
Loosely wrap a length of ribbon around, which will allow you to be able to fasten into a bow. Fix on the front cover only, with a piece of double sided tape.
Make a complimentary decorated mat to cover this tape. In my example, this is for a 50th birthday, but you could add any decorative design or even a photo.
This is the finished (except for the photos) design.....you can tell I like symmetry !!!
And a few close ups.
So come on...what are you waiting for. And don't forget to send me a photo of your finished project so I can add them to the inspiration page of my website.
Email: divinecrafting@btinternet.com
Enjoy !!
Christine
I have used 3 sheets of 12 x 12" paper, but you could use any size, providing they are square. They don't have to be double sided, but it will give you more scope to use the back of the album. To make it easier for you to follow these instructions, I have used single sided paper so you can clearly see the white backing.
So let's get going.....
 With the pattern side up, begin by folding a sheet on paper in half vertically. Open out and fold in half horizontally. Open out again, and flip over so the pattern side is now facing down. Now fold the paper in half diagonally. MAKE ONLY ONE DIAGONAL FOLD. Open back out, flip over, and using these creased lines, you should be able to manipulate your paper in, thus creating a quarter of the original size (see photo to the left).
 Repeat with another sheet, BUT with your third sheet you will need to do all the folds with the opposite sides facing. This will create your centre panel.
If you look at the final photo this week, you see I have opened out all the pieces, and attached the centre one, on top of the two outer pieces, fastening together on the complete quarter squares that do not contain a diagonal score line.
Repeat with another sheet, BUT with your third sheet you will need to do all the folds with the opposite sides facing. This will create your centre panel.
If you look at the final photo this week, you see I have opened out all the pieces, and attached the centre one, on top of the two outer pieces, fastening together on the complete quarter squares that do not contain a diagonal score line.
 So come on...get busy and be ready to start decorating it next week.
Christine
So come on...get busy and be ready to start decorating it next week.
Christine
This is an easy and fabulous technique, that can create some stunning effects, and can be for any occasion. I have in the past, made sympathy cards as well as thank you and birthday cards, using this simple technique.
The
main consideration is the card stock you use, and you may have to test
lots of different cards before you find one that the bleach will react
with.  The
card must be uncoated. Unfortunately many
manufacturers now appear to coat the card (I am told by a friend in the
business that the technical term is laminate - totally different to
what we crafters believe lamination to be). I also find mid to dark
colours work better in order to see a contrast. The colour activation
when bleached will also vary, as each final card colour can be made up
of a variety of colours in the dyeing process.
The
card must be uncoated. Unfortunately many
manufacturers now appear to coat the card (I am told by a friend in the
business that the technical term is laminate - totally different to
what we crafters believe lamination to be). I also find mid to dark
colours work better in order to see a contrast. The colour activation
when bleached will also vary, as each final card colour can be made up
of a variety of colours in the dyeing process.
 I
used a specific bleach pad called Castaway, but you could fold some
kitchen tissue, place in a plastic container large enough to allow your
stamp to be inserted, and carefully pour on some household bleach until
the kitchen tissue is thoroughly damp...thus making your own bleaching
pad. When you've stamped your image onto your card stock, allow it to
dry for 5 minutes. In the meantime, thoroughly clean all the bleach
from your stamp so it does not rot the rubber. I should also have said,
that a stamp that is fairly deeply etched works better.
I
used a specific bleach pad called Castaway, but you could fold some
kitchen tissue, place in a plastic container large enough to allow your
stamp to be inserted, and carefully pour on some household bleach until
the kitchen tissue is thoroughly damp...thus making your own bleaching
pad. When you've stamped your image onto your card stock, allow it to
dry for 5 minutes. In the meantime, thoroughly clean all the bleach
from your stamp so it does not rot the rubber. I should also have said,
that a stamp that is fairly deeply etched works better.
 After 5 minutes, cover with a piece of clean copier paper and place a hot (highest setting), dry iron over to activate the bleach on the card. as you can see from this example, the red card turned a yellowy orange. I then used the same stamp to stamp the image at either side, using an embossing ink, and heat setting gold embossing powder. The bleached images creates a depth in the perspective of your design. Don't be afraid to stamp off the edges, and don't get hung up about everything being in line either - particularly with floral themed stamps, they would naturally occur free and easy !! All that's left to do is mount onto card, I like to use a metallic colour that matches whatever embossing powder I have used. Add a greeting is you wish, depending on the purpose of the card, and a few gemstones for a delightful accent. When you've tried this, you'll find it so quick and easy (providing you can source enough card), that you could get a production line going. What about snowflakes, or a Christmas tree and get ahead - you know you'll run out of time if you don't start making those Christmas cards soon :)
Have fun !!
Christine
As a continuation from last week , I wanted to extend the theme.
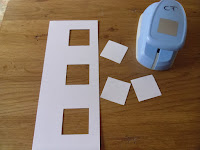 I began with a strip of card from an A4 sheet, approximately 20 cms in length. I used a medium square punch, but this time punched out three, one at each end and one in the middle.
 I used low tack tape again to anchor the stencil in place. This time I applied one colour to the top right corner, to about half way, diagonally. I used brushes, but foam is fine to apply your colour.
 I added a contrasting colour to the bottom left corner, lightly blending together where the colours meet.
 I used foam to apply more colour, to 'frame' the edge with the darker of the two colours.
 Again, carefully remove your stencil
.
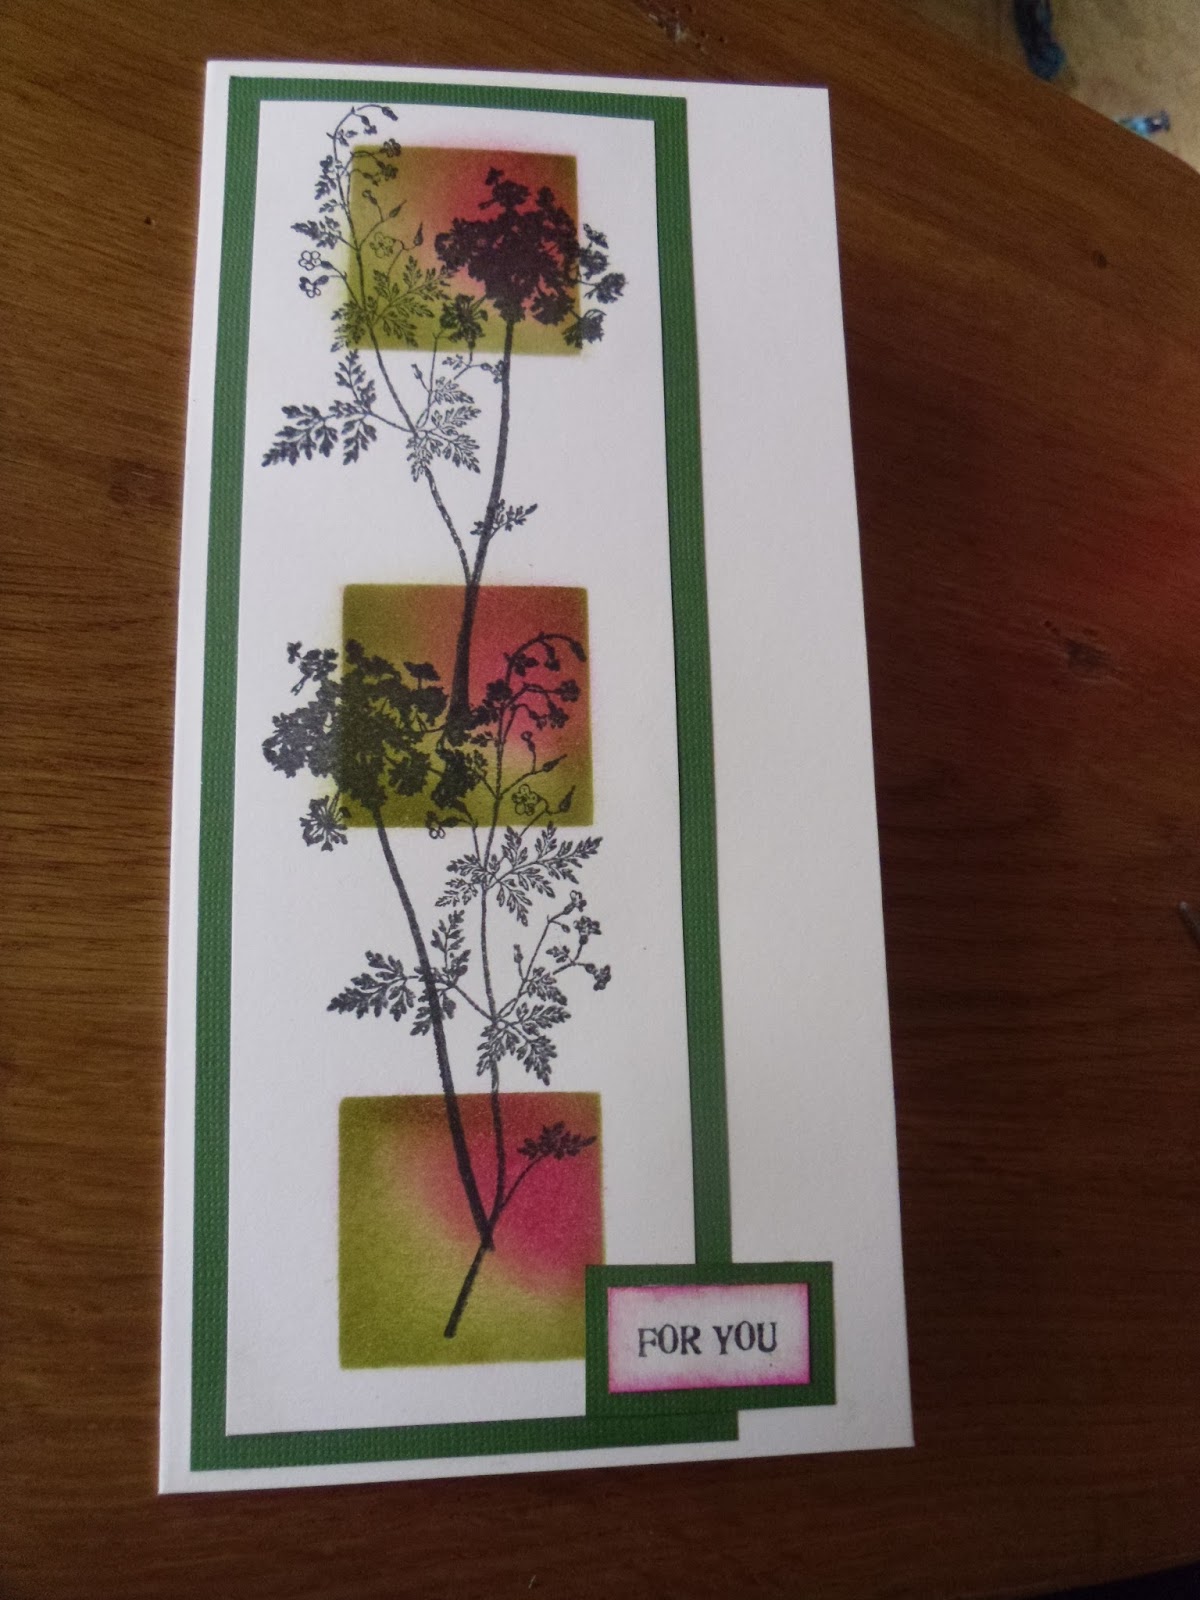
Stamp images over your stencilled area. Don't be afraid to do multiples of the image, extending them if necessary.
Stamp a sentiment and cut mats, then mount onto your card. Another quick card that creates a fabulous effect. You could also tie some ribbon around the spine, if you wish. Don't forget to send me some photos of your creations.
Christine


